For those interested in making books, Japanese stab bindings are an ideal place to start. They are simple, require only a few basic tools, and are endlessly customisable. The basic Japanese version of stab binding is called Yotsume Toji, which roughly translates to “four holes” the same as the Chinese version, while the Korean standard has five holes (a more favourable number in Korean culture). All styles were practiced during the Edo period in Japan 1603–1867 and the Qing Dynasty in China 1636 – 1912.
Stab binding is a really useful and adaptable way to use single sheets of paper to create an individualised book. I like to use a softer paper such as a printmaking paper which is ideal for creating sketch books with a bit of substance and is a great way of using up all those offcuts I can’t bear to throw away. This weight of paper is good for techniques such as drawing, painting, collage but you can mix and match any paper you have to hand including copier paper, printed paper, tracing paper, recycled envelopes etc the list is endless.
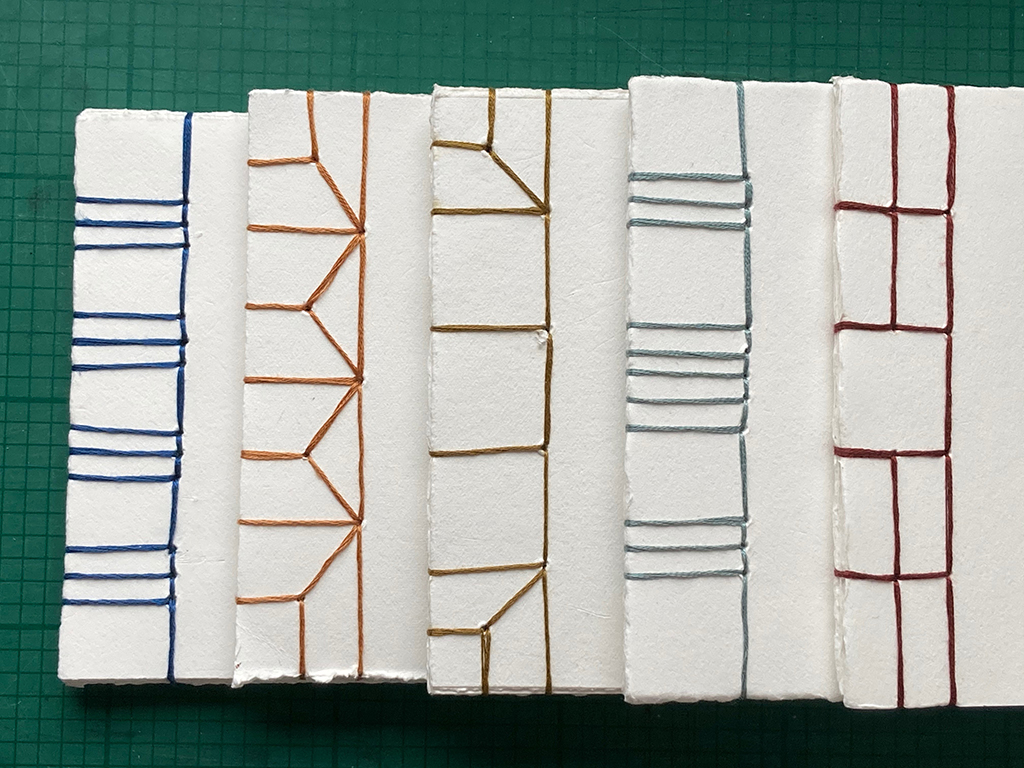
The distinctive linear stitch pattern created on the spine of the book gives a very clean look and I often leave the cover page blank with the stitch being the only form of decoration. However you can use a contrasting paper on the front and rear of the book or decorate it once the book has been made.
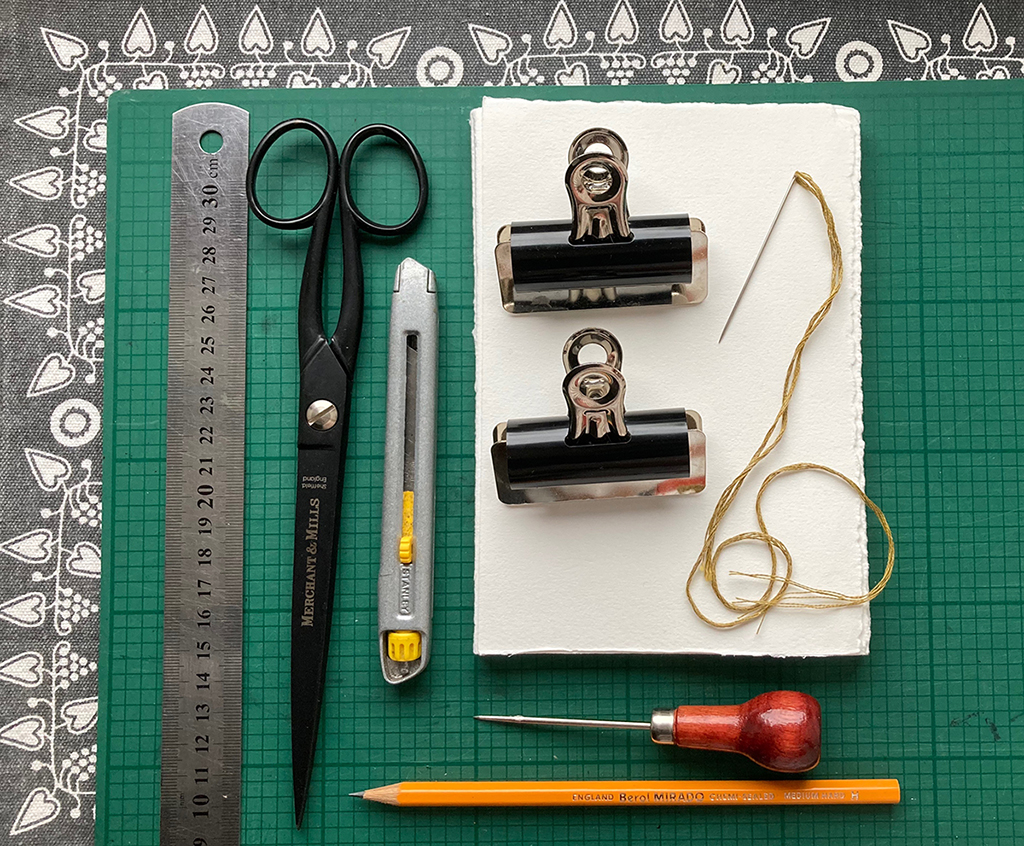
Materials:
- Ruler
- Stack of pre-cut / torn papers
- Knife with a sharp blade
- Scissors
- Cutting mat, or surface to cut on
- Awl, needle in cork, or nail and hammer for punching holes in your book
- Large sewing needle
- Bulldog clip, to hold pages together while sewing (optional but it does make things easier) try clothes pegs if you don’t have bulldog clips
- Thread – waxed thread is lovely to use but I often use embroidery thread which I pull round the outside of a candle. If you don’t have embroidery thread several lengths of sewing thread can be used
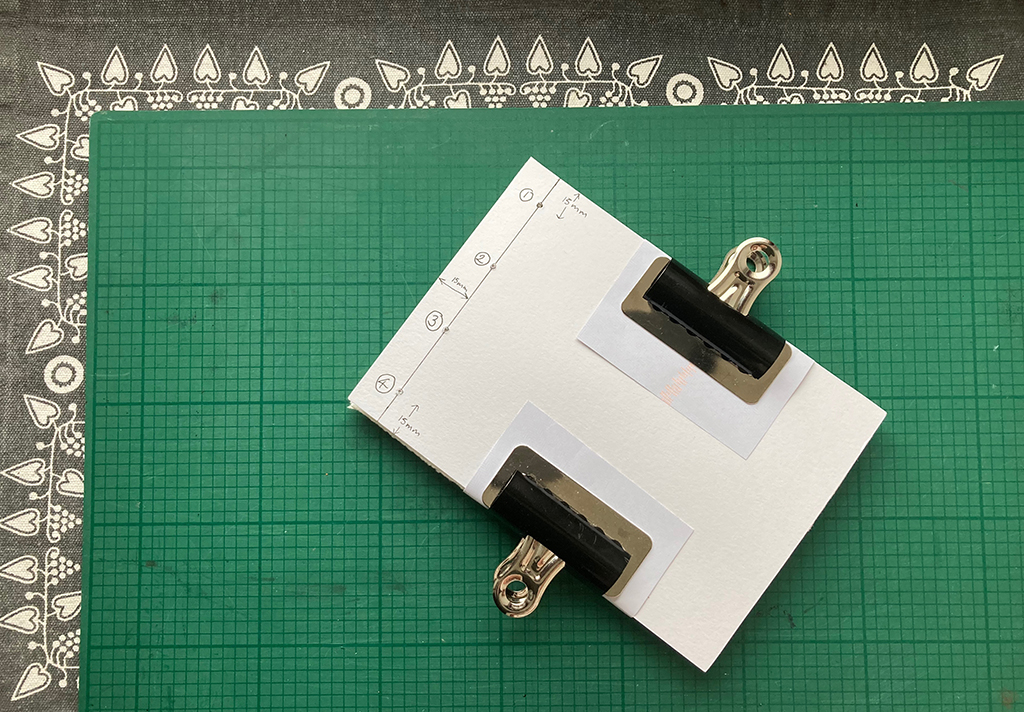
Begin by make a template that is the same height as your book. Rule a line running 15mm parallel to the left-hand short edge. Mark a dot on that line 15mm (½in) down from the top, and another one 15mm (½in) up from the bottom. Measure the distance between the two dots and divide by 3. Using this measurement measure that distance from the top and bottom dot and mark.

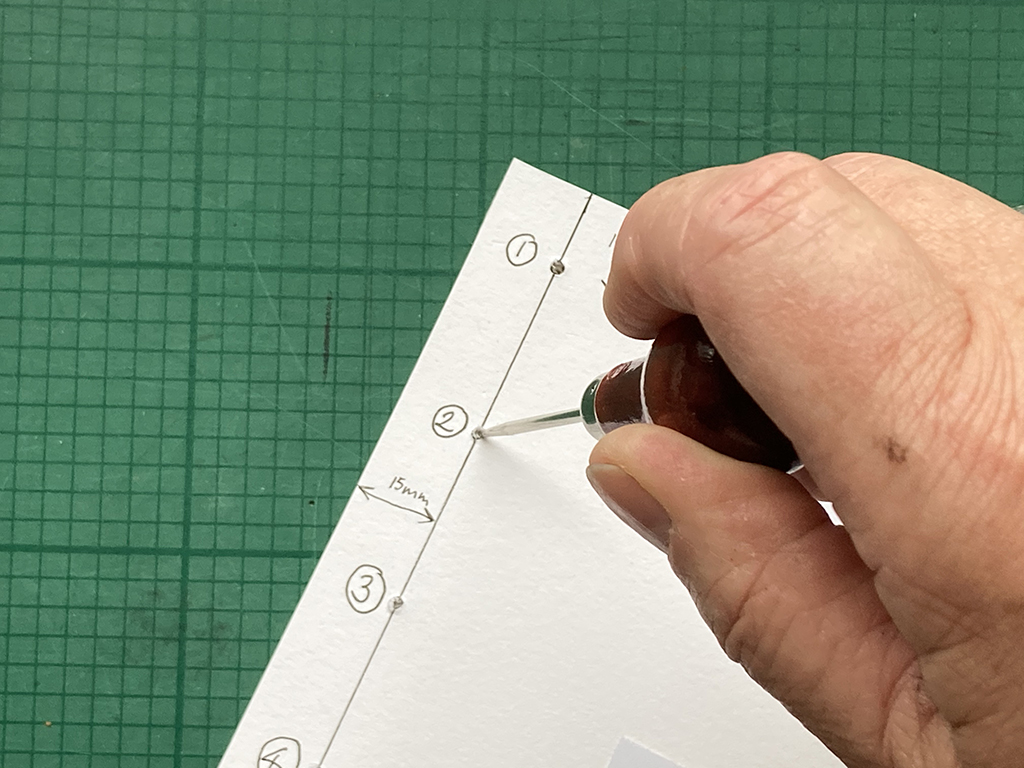
With a cutting mat or piece of board under your pages carefully make holes that go through every page in your book stack. Try to keep the awl or needle at 90 degrees to the book, so that the holes go straight down, rather than at an angle. Remove the template.
Thread your needle with thread measuring five times the height of the book.
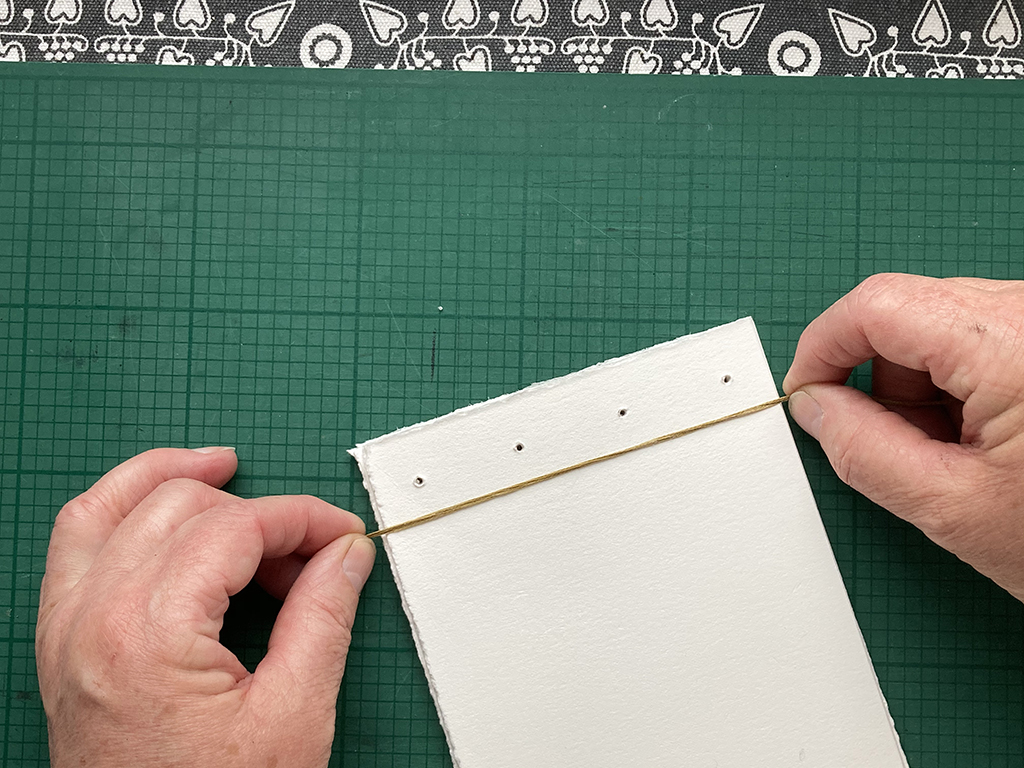
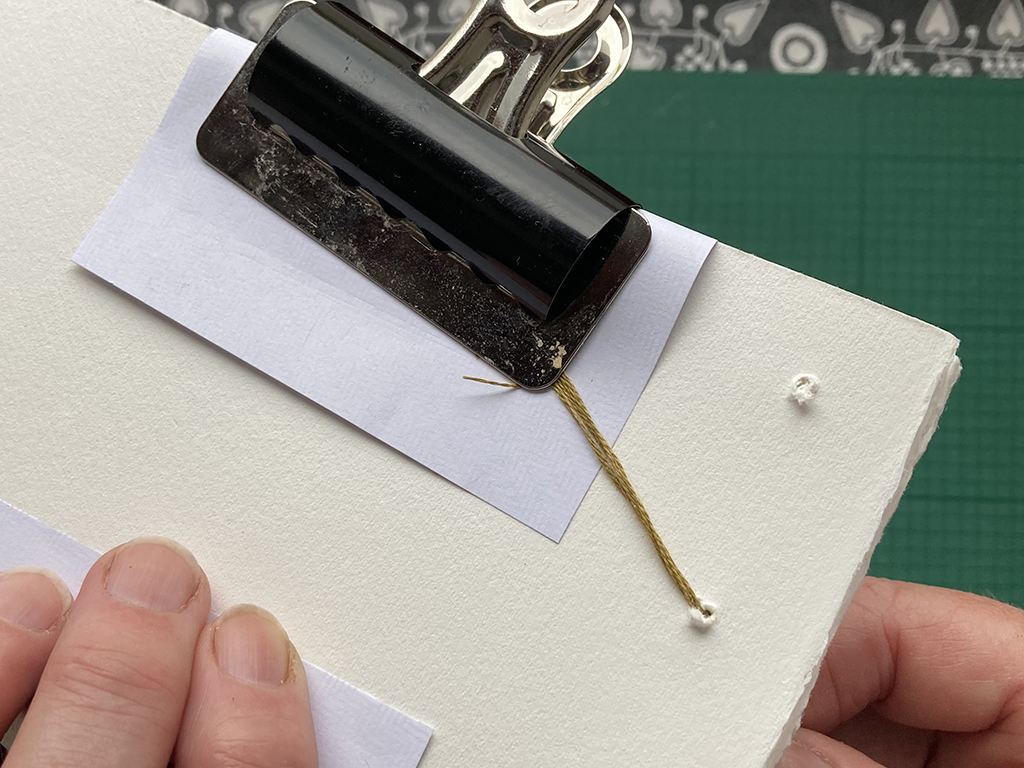
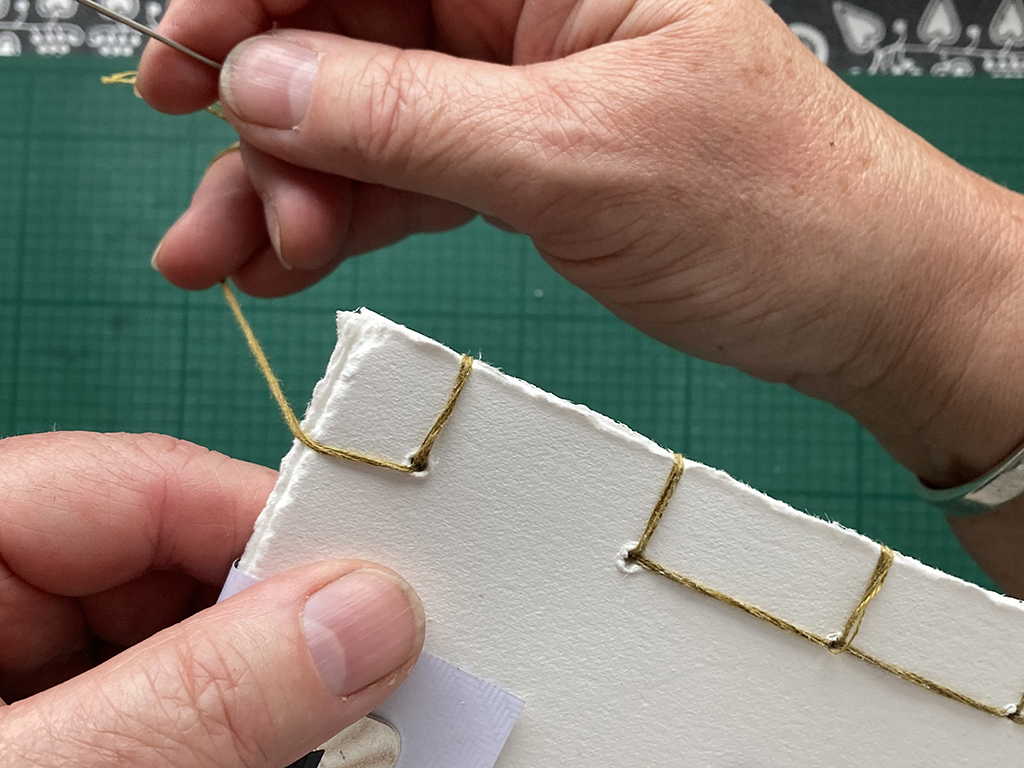
Starting at the second hole from the top (2) bring your needle up through all the pages from the back leaving a tail which you will use to tie the thread off at the end. You could trap this in one of the clips to keep it secure.

Take the needle round the spine and back into the same hole (2). Continue up to the top hole (1) go through it and around the spine, go over the end of the book and back into the same hole (1) keeping the thread tension nice and firm

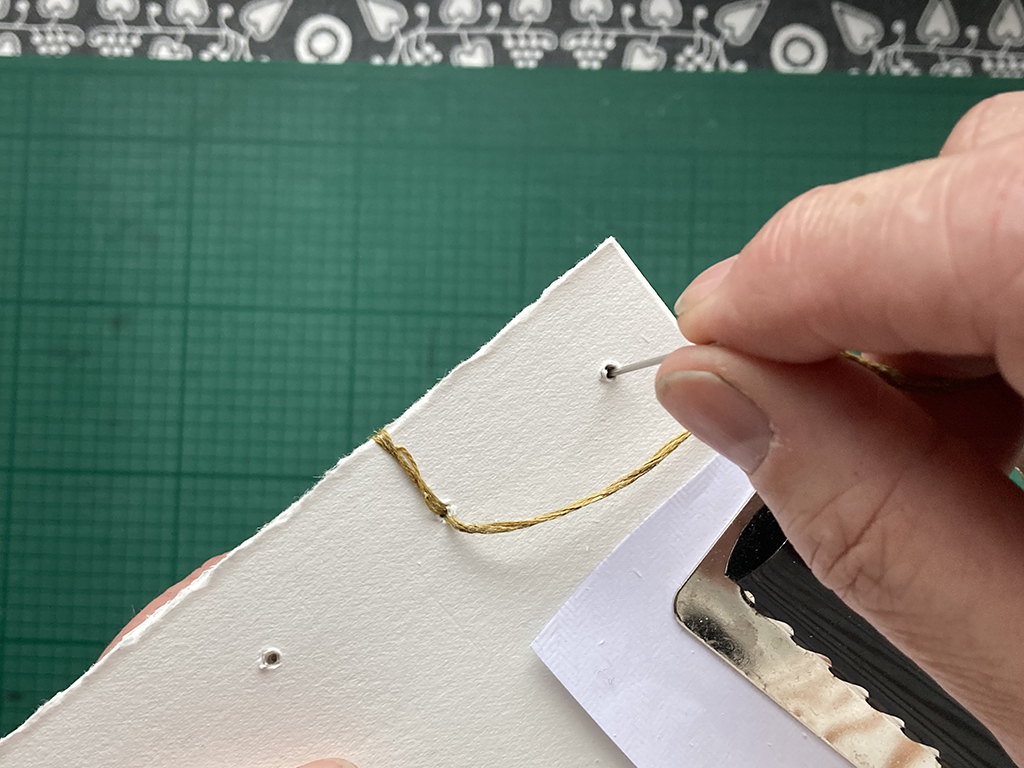

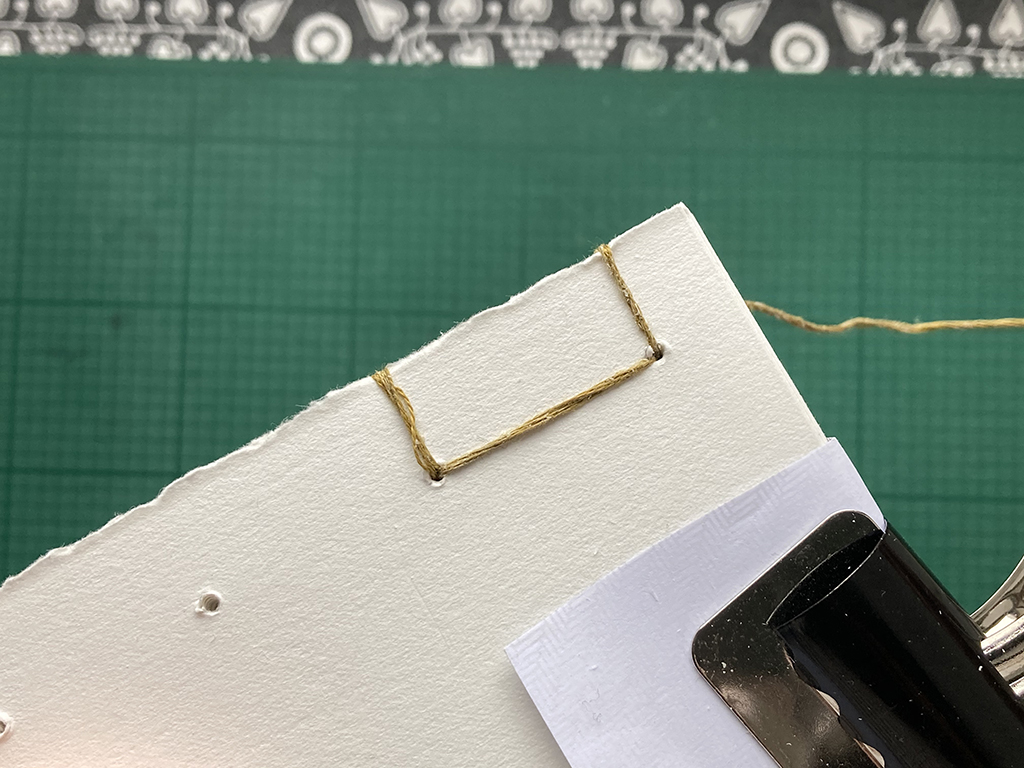
Take your needle into the second hole down (2), and come back to the front where you started. You should notice that a pattern is starting to appear.


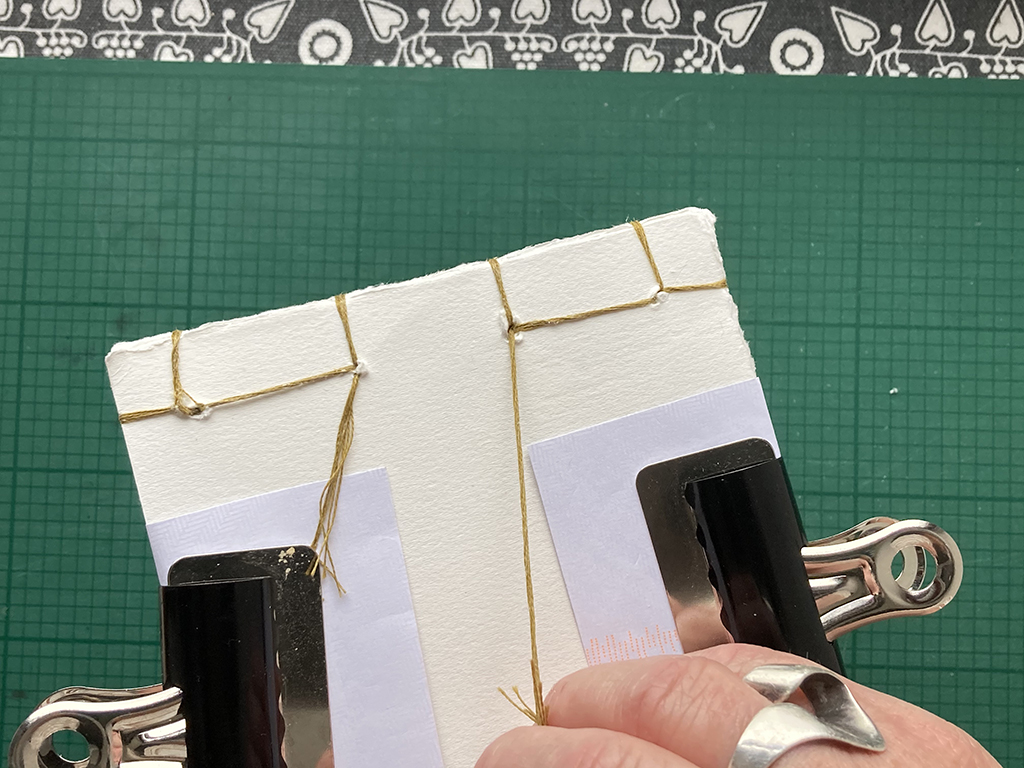
Work the bottom half of the binding in the same way: so go down the next hole(3), wrap around the spine and back into that same hole. Bring your needle up through the bottom hole (4) and wrap around the spine coming back into the same hole (4) go over the end of the book and back into the same hole (4).

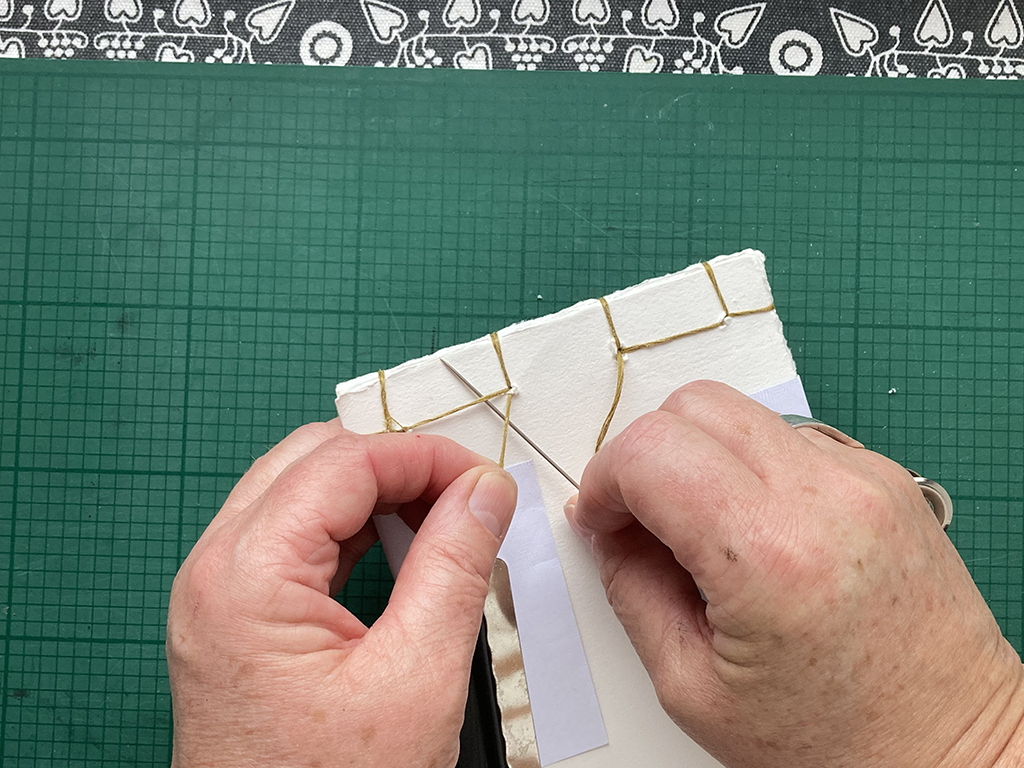
You should now take your needle down the next hole (3). All the gaps in the pattern on the front have now been filled in, when you turn the book over you will find a gap which will be filled once you have tied off the last stitch.

Working from the back of the book tie off the thread by going around the thread coming out of the second hole so it is securely held. Make two or three knots to ensure it won’t come undone.

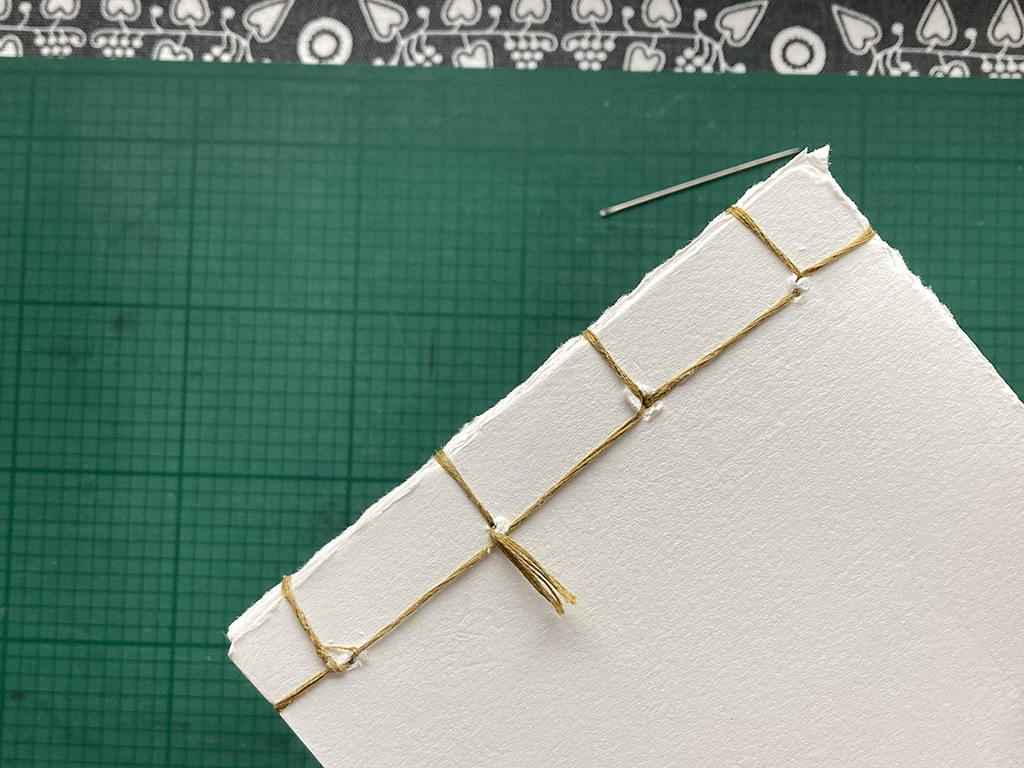
Some people like to make the threads disappear inside the book by cutting the ends short and tucking them back into the second hole but I’m happy to leave them showing on the back.
Now you have a simple but elegant book ready to be filled with words, images or prints.
Once the basic version has been mastered, you could investigate more complex stitch patterns, such as hemp leaf or tortoiseshell, or invent your own it becomes a strangely compelling pastime.
Jan

Comments 13
What a treat….thank, you so much.
Thanks – quite hard trying to unpick what I do when making a book but think I finally included everything!
I will try this out…thank you! x
Great – let me know how you get on.
Lovely idea for a personalised gift – thanks Jan.
They do make great gifts – I often make a few using different coloured threads and if I’ve time make a slip case to keep them all together. Also a great way to use up different papers.
Fantastic. I teach art and wellbeing courses for the WEA and this will be a simple and useful tutorial. Thank you.
Glad you found it useful – once you’ve done one its plain sailing!
Thanks,
these are great,
Rosie
Thanks Rosie glad you enjoyed it
I am making a Japanese stap bound book for a module at uni. I have Taso Washi paper separated with Liber Charta and BK Rieves for the cover. The paper will be A3 portrait. Could I ask if four or five holes will be sufficient to hold this together?
Thank you for reading this enquiry.
Linda
Hi Linda
My advice would be go for five at least. Basically the more holes you have, the stronger it will be, there will be less torsional twisting. I would divide the height by a number and go form there, you could for instance go for gaps of approx 2.5cm. This would give you loads of holes, a lot more stitching work, but a much stronger book at the end. Its up to you, but if it was a choice between four or five, I would go five.
Hope that helps, John
Thank you for your reply. Much appreciated